
Новинка подходящая к W221 S600 CL550 CL600 задняя правая амортизационная распорка ABC LuCIFINIL
72 998,88 руб.


Новое поступление

Магазина XuSpring Car Items Store работает с 01.03.2019. его рейтинг составлет 84.66 баллов из 100. В избранное добавили 1175 покупателя. Средний рейтинг торваров продавца 4.4 в продаже представленно 898 наименований товаров, успешно доставлено 4477 заказов. 2874 покупателей оставили отзывы о продавце.
Характеристики
*Текущая стоимость 4 030,76 - 5 038,86 / lot уже могла изменится. Что бы узнать актуальную цену и проверить наличие товара, нажмите "Добавить в корзину"
| Месяц | Минимальная цена | Макс. стоимость | Цена |
|---|---|---|---|
| Mar-18-2026 | 4796.30 руб. | 5036.42 руб. | 4916 руб. |
| Feb-18-2026 | 4755.51 руб. | 4993.72 руб. | 4874 руб. |
| Jan-18-2026 | 3990.97 руб. | 4190.28 руб. | 4090 руб. |
| Dec-18-2025 | 4675.63 руб. | 4909.68 руб. | 4792 руб. |
| Nov-18-2025 | 4070.34 руб. | 4274.67 руб. | 4172 руб. |
| Oct-18-2025 | 4594.83 руб. | 4824.23 руб. | 4709 руб. |
| Sep-18-2025 | 4554.94 руб. | 4782.6 руб. | 4668 руб. |
| Aug-18-2025 | 4514.24 руб. | 4740.27 руб. | 4627 руб. |
| Jul-18-2025 | 4473.19 руб. | 4697.94 руб. | 4585 руб. |
Описание товара


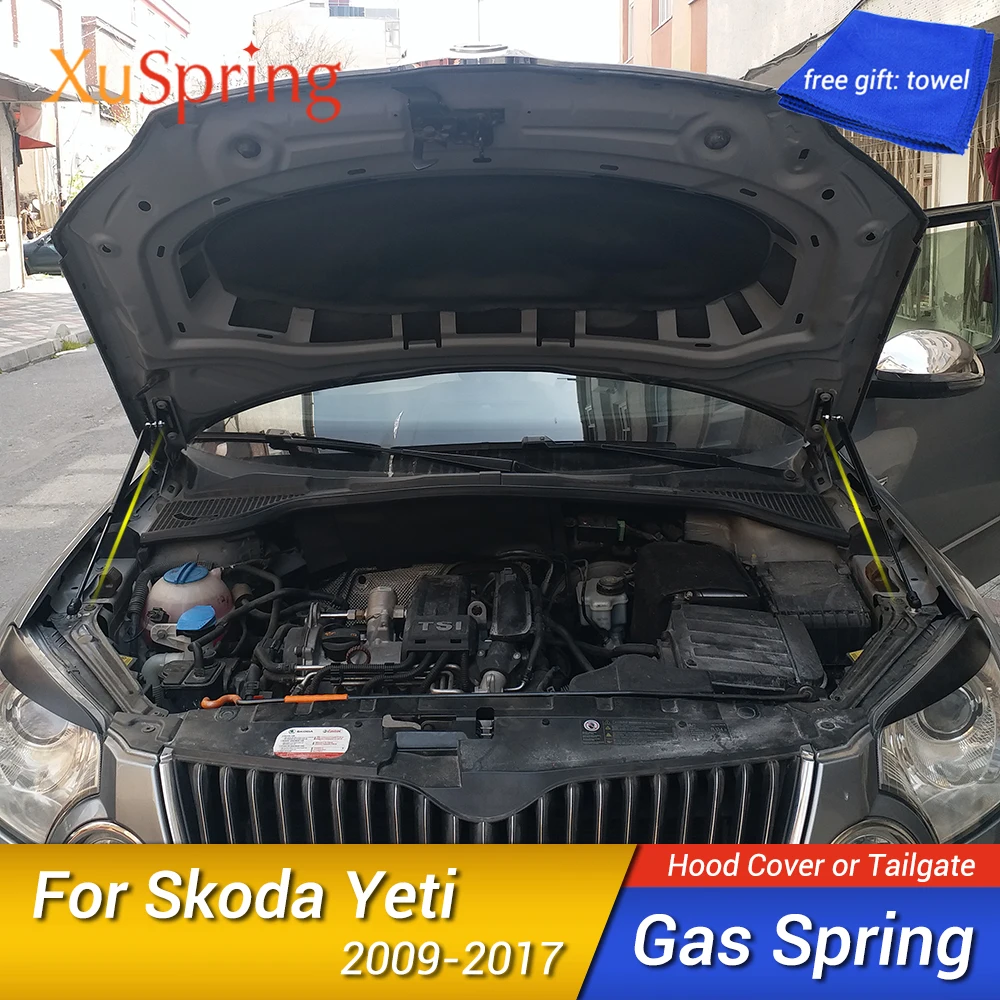
Car Bonnet Hood Supporting Strut Bars Refit
fit for skoda yeti
Year: 2009-2017
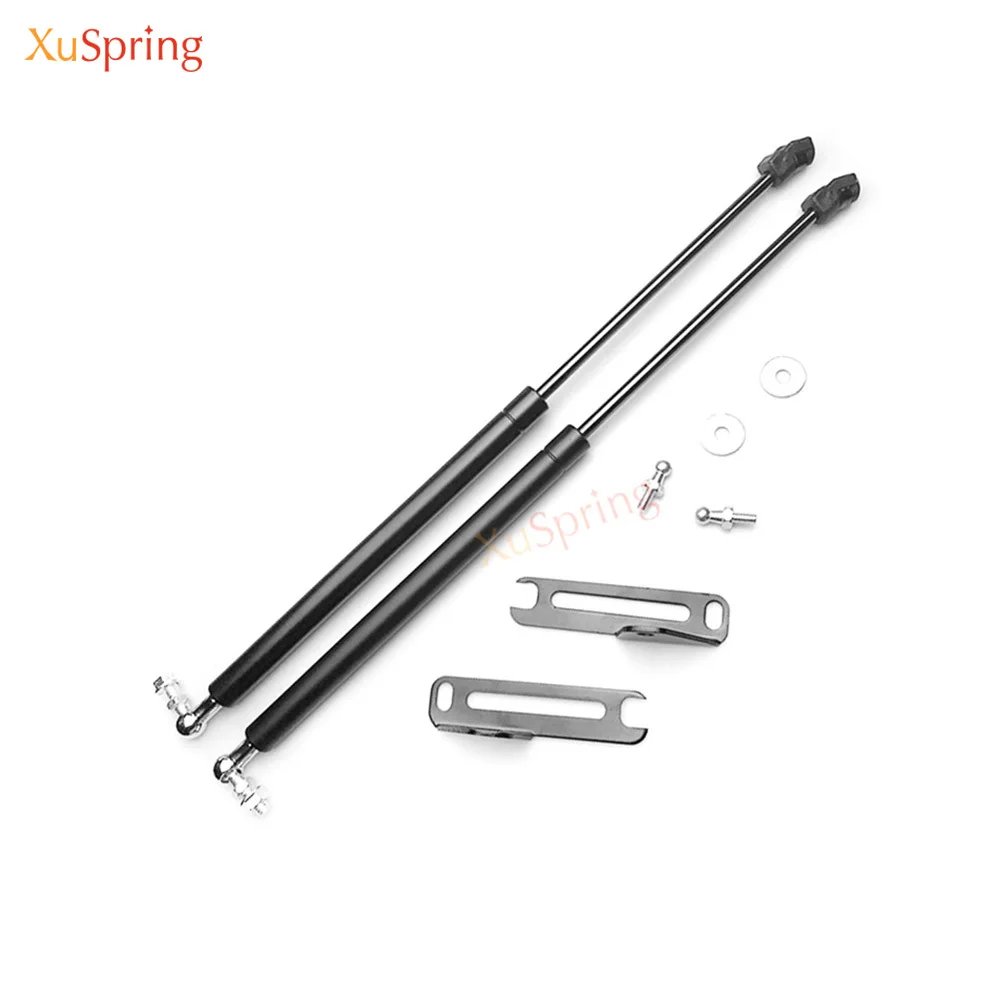
Material: High Quality Carbon Steel
Quantity: 2pcs rod with accessories
After-sale Warranty: 1 Year
FAQ ! ! !
Question: Whether the product is universal?
Answer: All of the products are AA customized, if the type don't including your car, please contact us, we will check the product for your car.
Question: How to install it?
Answer: It is very easy to install. There are installation instructions at the end of the details. Some car type we will offer the install video. Such as for CX-5\Axela\Atenza\Karoq\T-roc\Tucson\Sportage\Kuga\Kadjar.
Question: How many pieces rod for a car?
Answer: Most of the car need two pieces rod, but some of them only need one piece rod. But both of them will fit for the car well, all of the product has been tested.

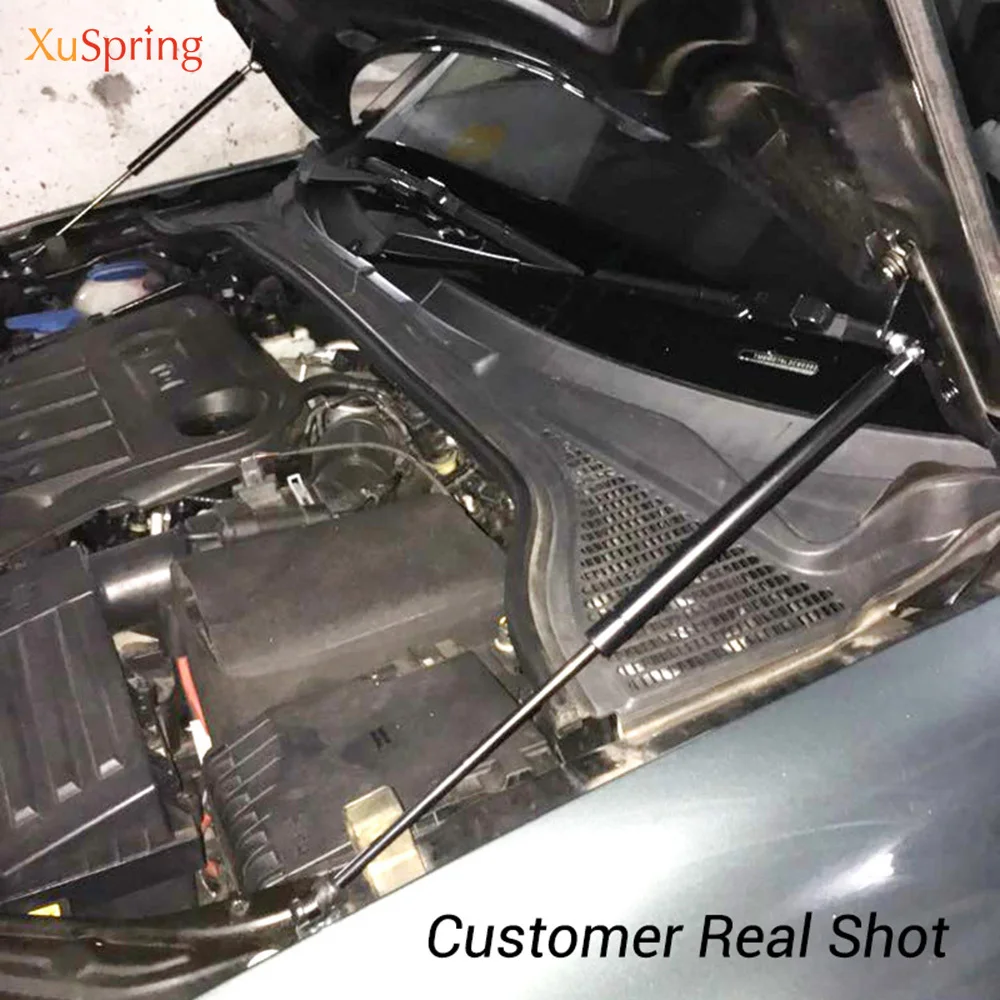
Installation Effect


Strut Bars Showed
Just for reference, different car will have different length and connector.
If you want to know more of the items, please contact us.

Various Bracket
AA custom items for different car models.
According to the original car hole design, don't need additional drilling.

Selected High Quality Steel
Stronger,reliable and durable

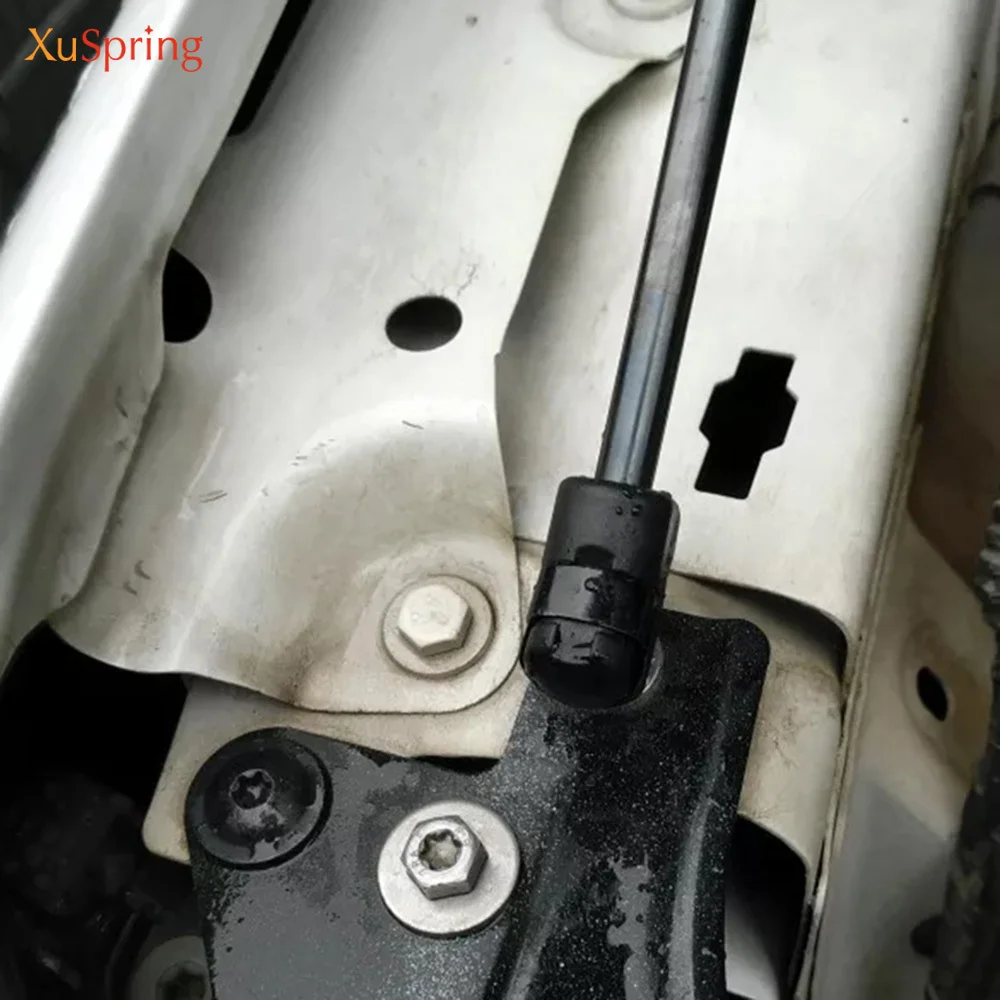
Ball head screw

Classic Car Paint Process
After repeated telescopic testing. Service life up to tens of thousands of times,
beautiful, antioxidant.

All of the copper hydraulic seal, entire journey buffer, stable performance,
excellent sealing, prevent oil leakage.

Detachable connector

Qualified test
All of the products were tested and quality-checked.


Production workshop display
Turning

Pressure detection

Assembling

Packing

Positive Feedback

Gifts
All of the customers, who place an order, will be presented three small gifts.
1. High quality car clean towel, 30*30cm.

2. A varity of key chain as gift. (One of them, The picture show just a part of them.)

3. A set of little devil car logo stickers.

Installation Tips
Universal installation method
Accessories Description

Type A installation instructions
Step1. Check the real shot in product window showed picture, which like this picture ↓↓↓↓↓. Then you will know which position for installation.

Step2. Remove the original screws, install the bracket on it or exchange the ball screw on it.
Step3. Install the steel head on the bracket, and press the plastic head into the ball screw. Please don't screwed the head too tight, let the angle to be proper, to prevent the accessories damaged.
Step4. Install another side of the car, and the install finished.
( Some car models, maybe with two steel head or plastic head, but install method is same. This method don't need auxiliary strip.)
Type B installation instructions
Step1. Check the real shot in product window showed picture, which like this picture ↓↓↓↓↓. Then you will know which position for installation.

Step2. Remove the original screw, install the bracket on it.
Step3. Remove the buckle of the sound insulation mat, let the auxiliary strip coress pass through the original hole, and aligning the head screw with buckles hole, and install ball screw on it. Some car models need recover the sound insulation mat, then you can find the original hole.
Step4. Install the steel head on the bracket, and press the plastic head into the ball screw. Please don't screwed the head too tight, let the angle to be proper, to prevent the accessories damaged.
Step5. Install another side of the car, and the install finished.
Noting, if these two install methods don't for your car, please contact us, we will send the install video to you.
Looking forward to your order and have a good shopping experience.
Смотрите так же другие товары:


